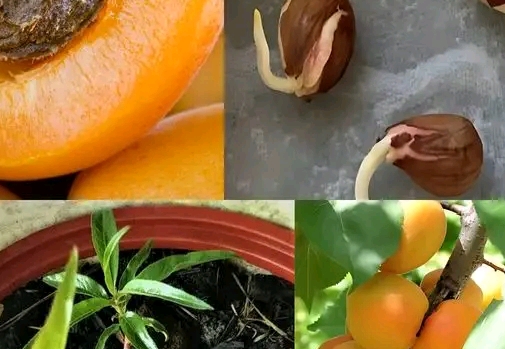
Step 1: Seed Selection and PreparationGrowing an Apricot Tree from Seed: A Step-by-Step Guide
Step 1: Seed Selection and Preparation
Choose Seeds: Select seeds from ripe, high-quality apricots.
Clean Seeds: Remove seeds from the fruit and rinse thoroughly to remove pulp.
Step 2: Stratification (Cold Treatment)
Cold Stratification: Place seeds in a plastic bag with a moist paper towel.
Refrigerate: Store in the refrigerator for 4-6 weeks.
Step 3: Germination
Remove from Fridge: Take seeds out of the refrigerator.
Prepare Pots: Fill small pots or seedling trays with well-draining potting mix.
Plant Seeds: Plant seeds 1 inch deep in the potting mix and water thoroughly.
Step 4: Providing Optimal Conditions
Light and Temperature: Place pots in a sunny location with indirect light. Maintain temperature around 70°F (21°C).
Watering: Keep soil consistently moist but not waterlogged.
Step 5: Seedling Care
Monitor Growth: Watch for germination within a few weeks. Ensure adequate light and water.
Thinning: Thin out weaker seedlings if multiple seeds are planted in one pot.
Step 6: Transplanting Seedlings
First True Leaves: Transplant seedlings into larger pots when they have several sets of true leaves.
Gradual Sunlight: Slowly introduce young plants to more sunlight to avoid sunburn.
Step 7: Outdoor Transplanting
Suitable Climate: Transplant outdoors in USDA zones 5-8.
Planting Site: Choose a sunny spot with well-draining soil. Plant at the same depth as in the pot.
Step 8: Ongoing Care
Watering: Water regularly, keeping soil moist but not soggy.
Fertilizing: Apply a balanced, organic fertilizer during the growing season.
Pruning: Prune to remove dead or damaged branches and encourage a healthy structure.
Pest Management: Monitor for pests and diseases, using organic treatments if necessary.