1. **Choose a Healthy Parent Plant**: Select a robust and healthy plant to ensure strong cuttings.
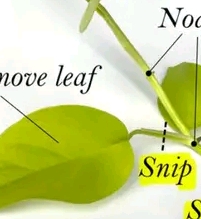
2. **Take the Cutting**: Using clean, sharp scissors or shears, cut a stem that is 4-6 inches long, making sure it has a few leaves and at least one node (the small bump where leaves grow).
3. **Prepare the Cutting**: Remove the lower leaves, leaving at least two leaves on top. This helps reduce water loss and focuses energy on root development.
4. **Optional – Use Rooting Hormone**: Dip the cut end in rooting hormone to encourage faster root growth, although many plants will root just fine without it.
5. **Place in Water or Soil**:
– **Water Method**: Place the cutting in a glass of water, ensuring the node is submerged but the leaves are above water. Change the water weekly.
– **Soil Method**: Plant the cutting in a pot filled with moist potting soil, ensuring the node is buried.
6. **Provide the Right Conditions**: Keep your cuttings in a warm, bright location, but out of direct sunlight. Covering them with a plastic bag can help maintain humidity.
7. **Wait for Roots**: Depending on the plant, roots may take a few weeks to develop. You’ll know they’re ready when they’re 2-4 inches long.
8. **Transplant**: If using the water method, transplant your rooted cutting into soil. For soil-grown cuttings, continue to care for them until they establish well.
